Introduction
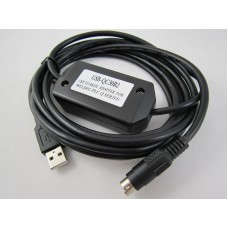
USB-QC30R2 is the programming cable in which USB interface provides both the serial connection and RS232 signal conversion. Under the control of computer-driven driver, the programming cable makes it possible for the computer's USB interface to simulate the traditional serial (known as COM interface), thus various existing programming software such as communications software, monitoring software and other applications can be normally used. The working power supply of this cable is directly from the USB port, but not the PLC programming interface. The two-color LED on the converter box indicates data’s transceiving status.
USB-QC30R2 is applicable to Mitsubishi Q series PLC (Q mode)
USB-QC30R2 principle and figure structure:
.jpg)
USB-QC30R2 programming cable simulate USB port as traditional serial port (usually COM3), which enables existing programming software(GX Developer) to communicate through simulated traditional port and PLC devices.
Functions
● Support USB-QC30R2 programming software version: GPP V4.0, GX Developer V7.0 and above.
● Fully compatible with USB V1.1 norms and USB CDC V1.1
● USB-bus powered, with current consumption of 50 mA
● Baud rate: 300 bps ~ 1Mbps automatically adapt to the standard baud rate
● Support UART data format: data bits: 7-8; stop bit: 1, 2; check-bit: odd / even / no parity
● Each PC only supports one USB cable programming
● Working temperature: -20 ~ +75 'C
● Color: black
Setting of GX Developer
Please set the driver procedure according to the following steps:
1. Turning on PC power that will connect the USB programming cable and make sure the USB port working well.
2. Put the USB programming cable into USB port and Windows will detect the device and help to add new hardware and jump to new device setting. Insert the driver CD and click “next” to continue, or select the driver on the hard disk.
If Windows does not show “find new hardware”, please click “Universal Serial Main Cable controllers” in the hardware list of device manager, and choose the USB device with question mark. Click the right key of mouse and operate to update driver procedure.
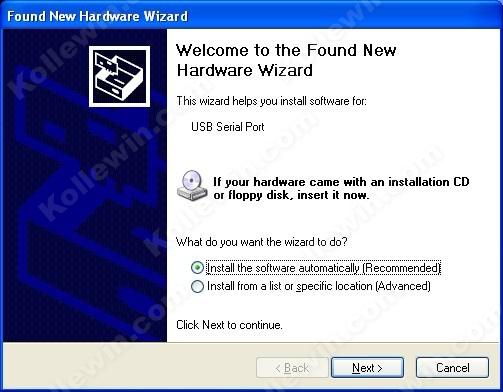
If insert the driver CD,you should select the recommended item and click “Next”.
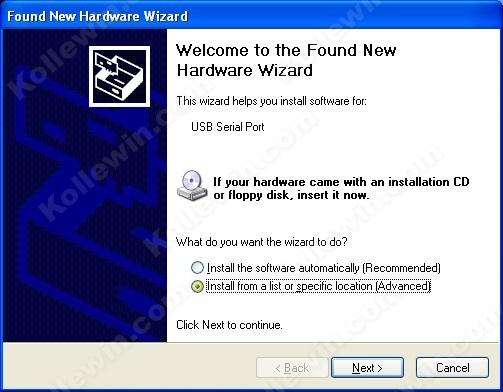
If the driver is saved on the hard disk, you should select the second item and click “Next”. You can find the driver on the “USB Drivers1” folder.
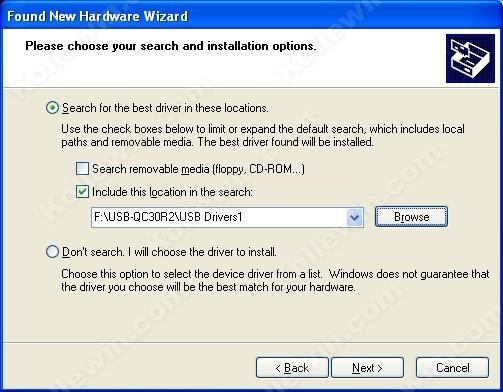
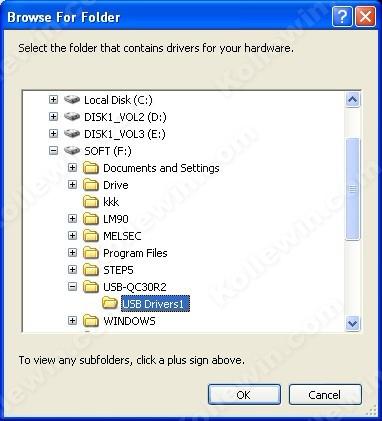
3. Windows will detect the setting information, and load the driver to install.
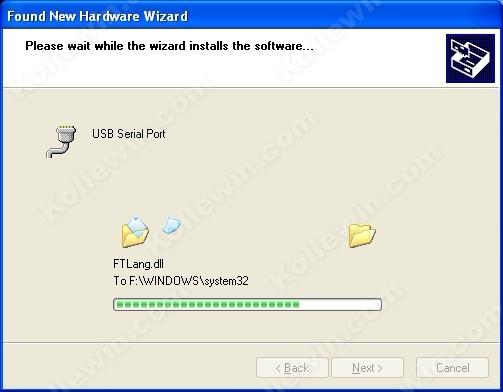
4. Continue to set up, copy the driver procedure files to your hard disk by Windows.
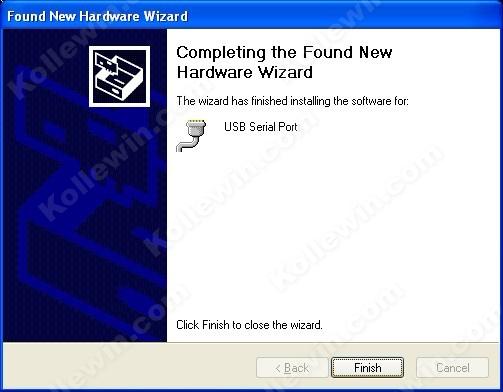
5. When Windows appears “Completing the Found New Hardware Wizard”, click “finish” to end setting up.
6. After setting up, please make sure the "Ports (COM and LPT)" of "Start Settings Control Panel system hardware Device Manager" appears "USB Serial Port(COMx)". This COMx is the COM port of the USB programming cable. From then on, as long as you insert the programming cable, the COM port will appear. You just have to choose this COM port in application software such as programming software or communication software.
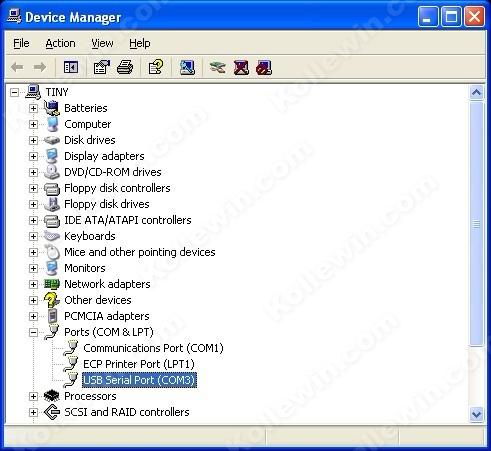
How to change COM setting
1. Delete the driver procedure of all USB to UART products to discharge COM port source, and reset up USB programming cable driver procedure. The device manager will display the cable address COM3.
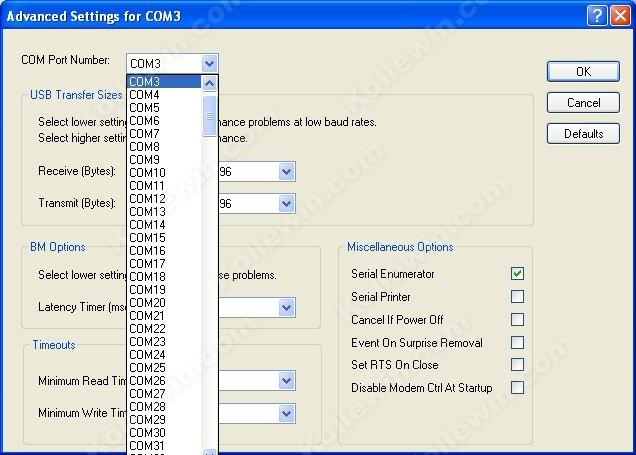
2. In Windows 2000/XP the COM slogan can be changed directly. Please double click COM port device that is need changing in the device manager, and the device attribute information window will appear. Choose “port setting” as the picture shows. Click "Advanced" button, and the advanced setting information window will appear. Set the COM port to the serial number you want and click "OK" button to complete.
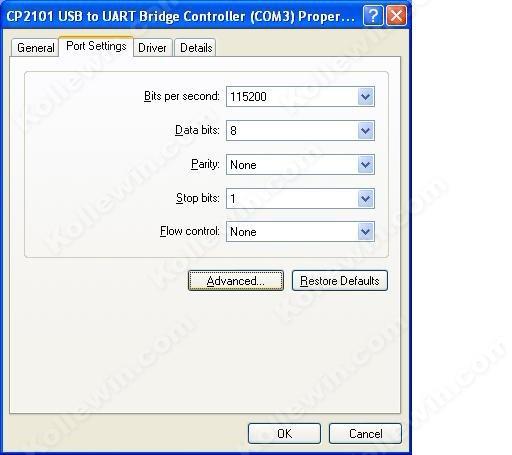
Setting of GX Developer
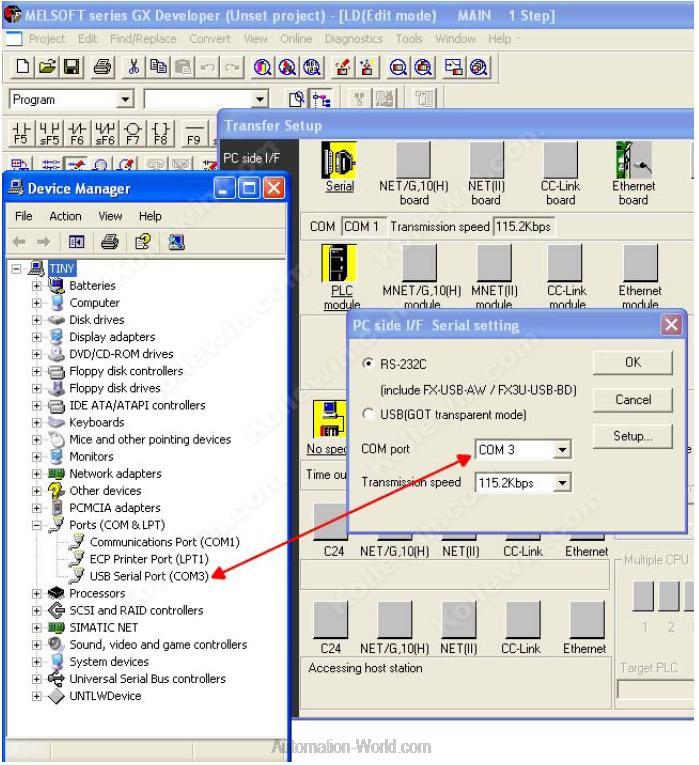
After completing Driver installation, the corresponding COM port for the USB-QC30R2 programming cable will be displayed in the “Device Manager” of Window. The step next is just to choose this COM port in the programming software and other application software and keep other communication parameters as in the Default settings. And the following steps are exactly the same as in the traditional programming cables with RS232 interfaces.
Open the main windows form(GX Developer), choose “Online” menu then click “Transfer Setup…” and will appear “Transfer Setup” window.
Click “Serial” button of the PC side I/F, and choice the COM X interface as it in the Device Manager.



.jpg)


